Knowledge Base
Path: /dashboard/ (Data tab) · Permission: Knowledge Base module
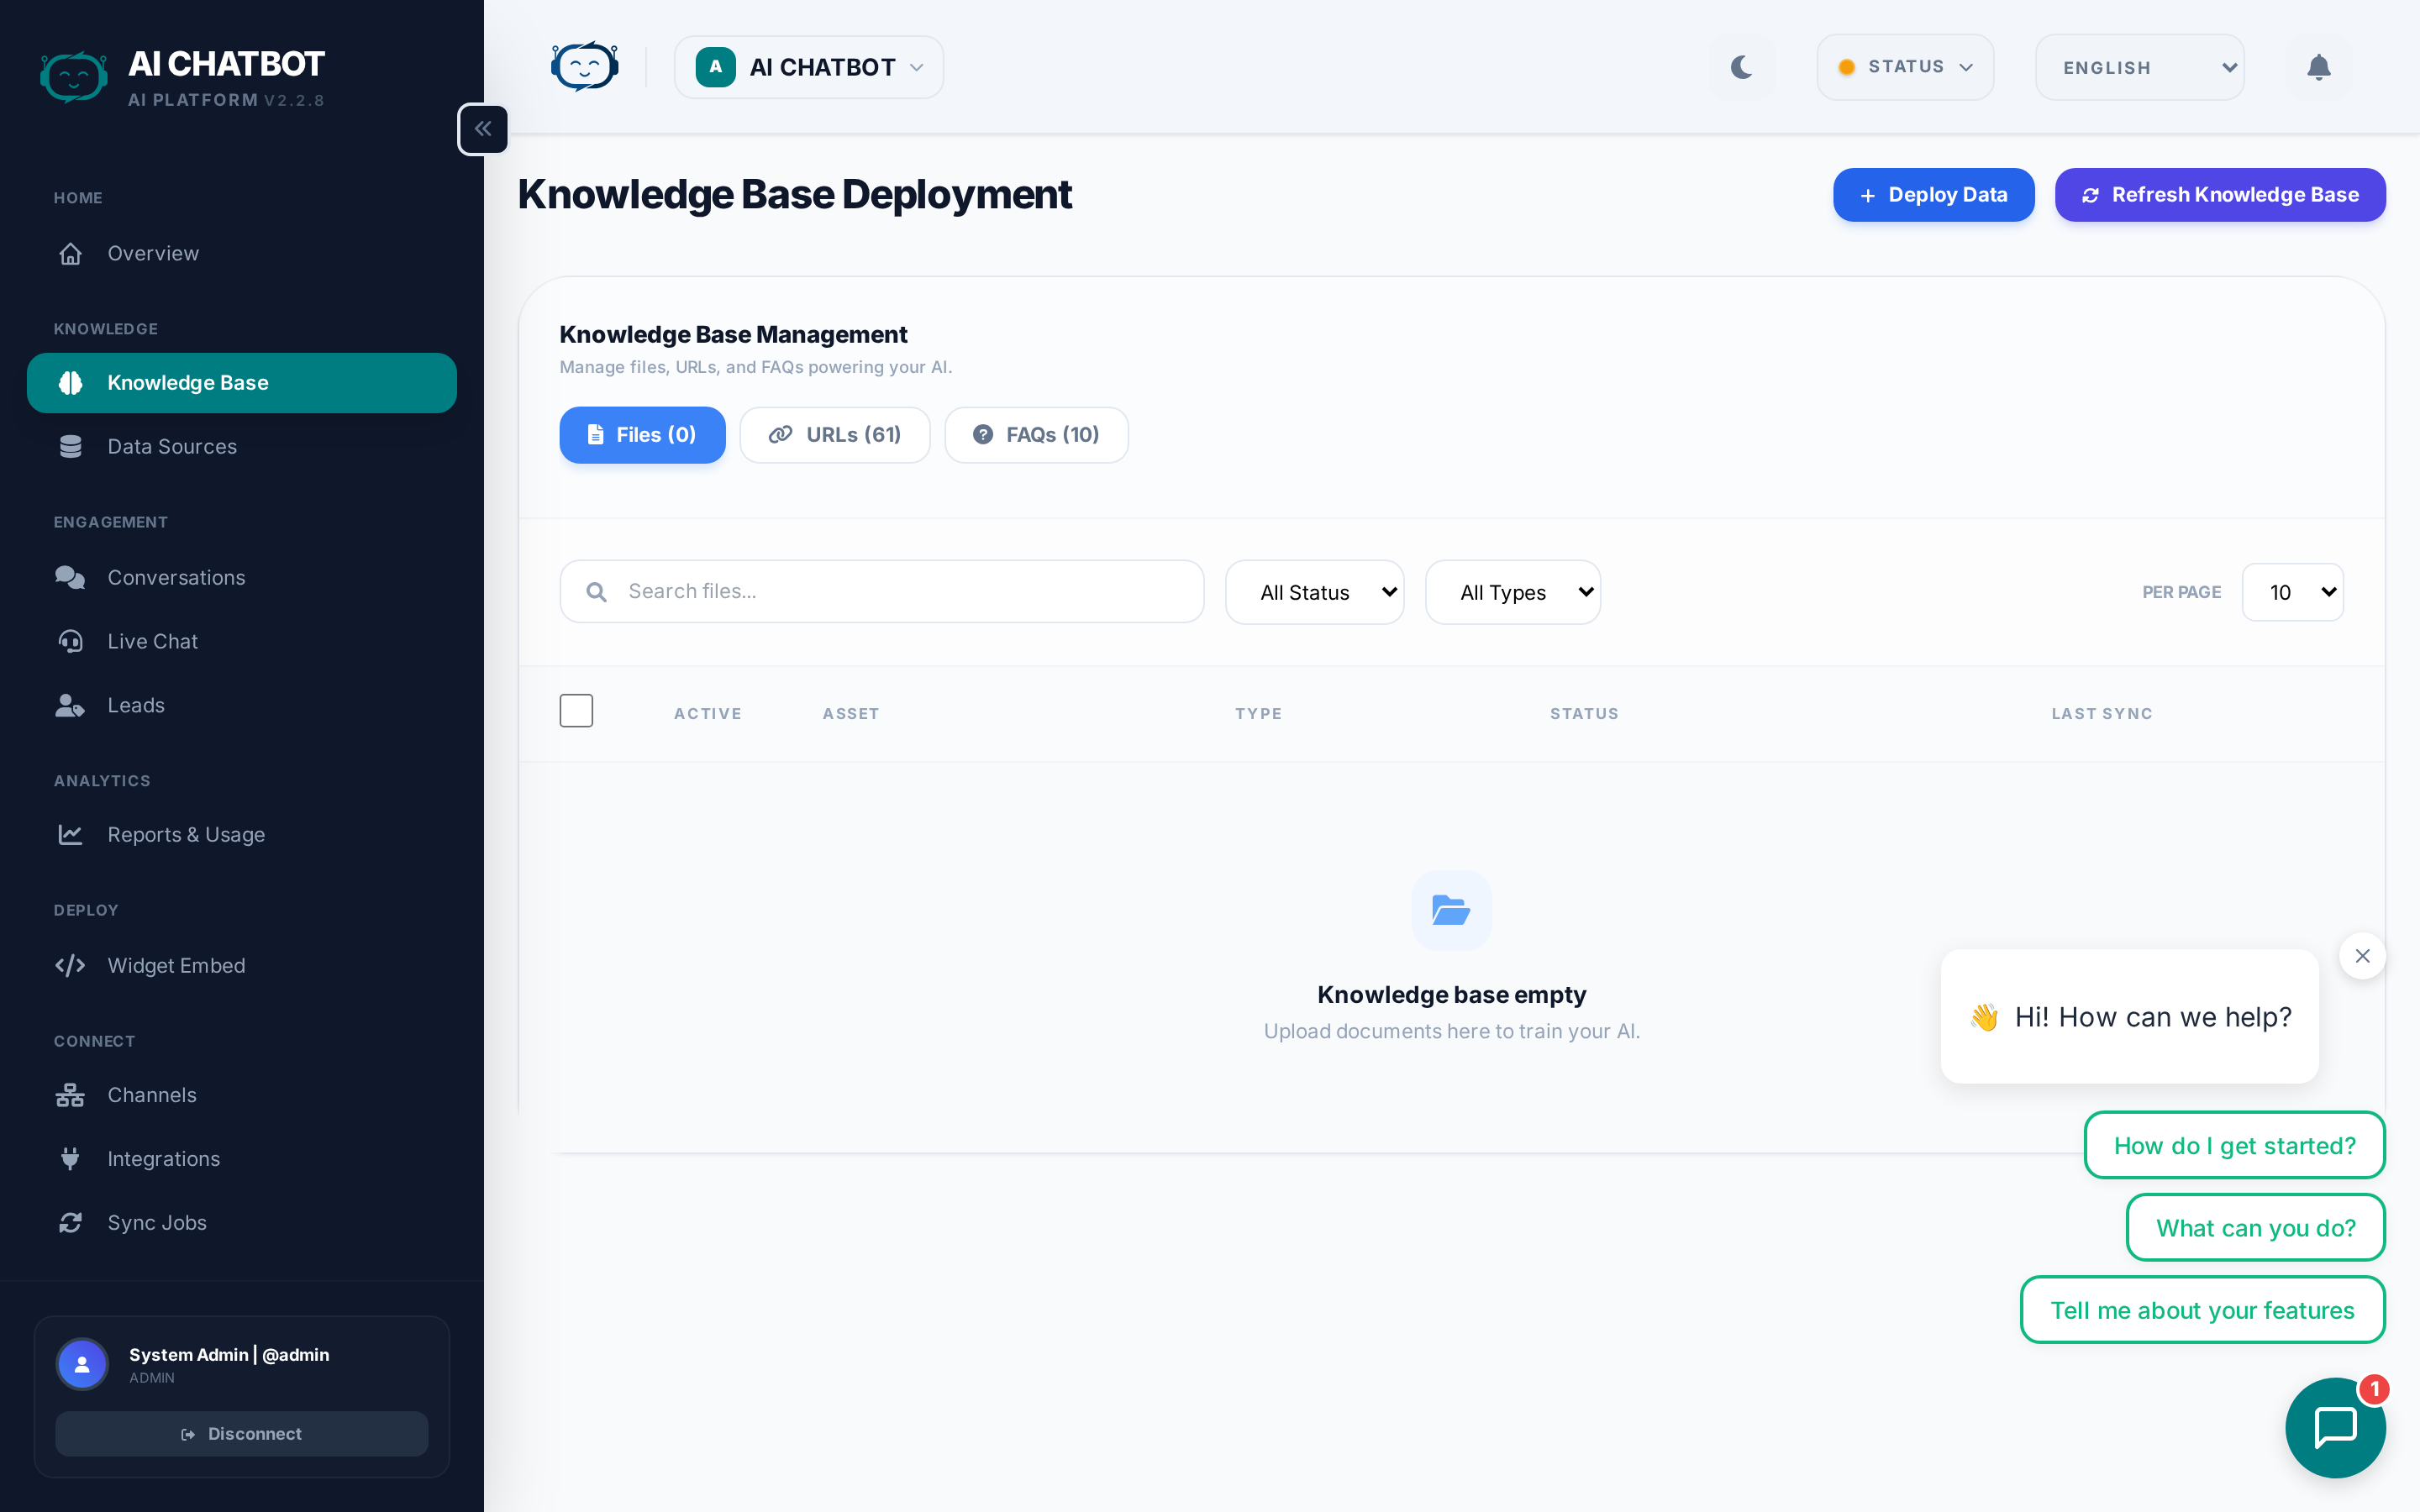
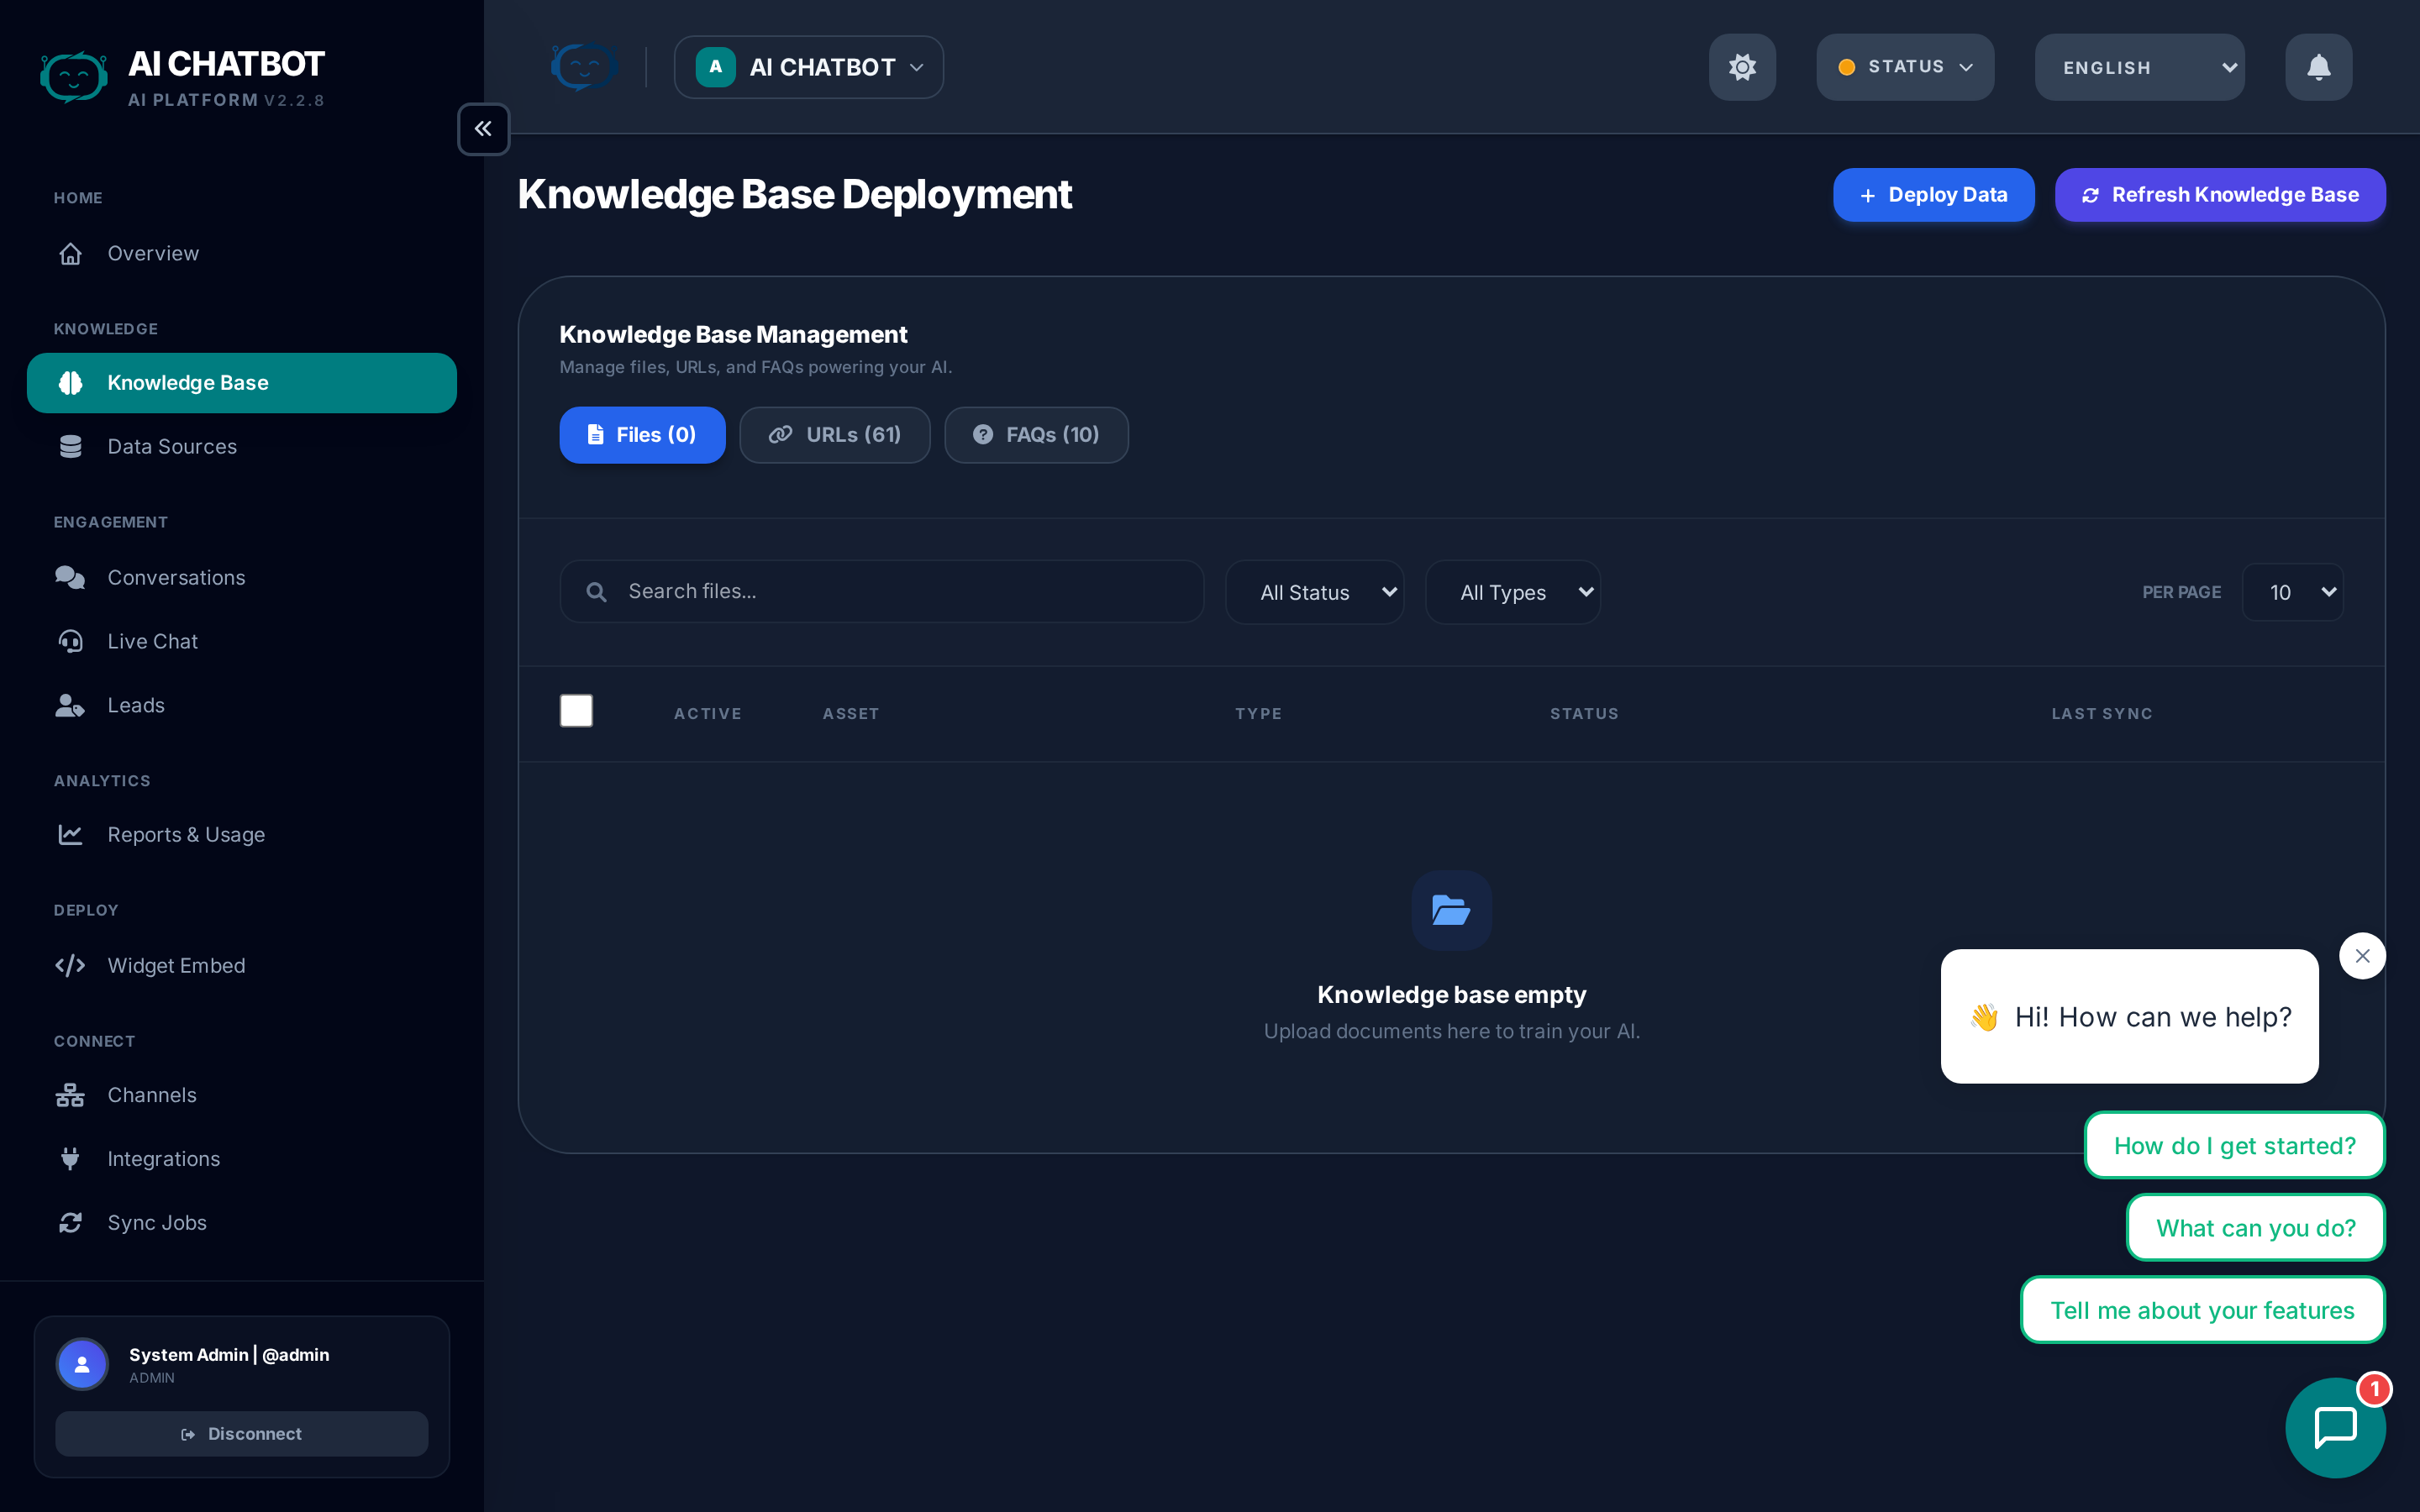
The Knowledge Base is where you train your AI assistant. It defines what the bot knows and can answer using your own documents, webpages, and curated FAQs. Everything you upload is indexed into a vector search engine so the bot can search by meaning — not just keywords. This is the foundation of your bot's intelligence.
How vector search works
Unlike traditional keyword search, FRENZY.BOT uses semantic search (also called vector search). This means:
- A user asking "What's the price?" will match a document about "pricing plans" — even though the exact words differ.
- The system understands meaning, not just keywords.
- Each piece of content is converted into a numerical "embedding" that captures its meaning.
- When a user asks a question, the system finds the most semantically similar content and sends it to the AI model for response generation.
This is why the quality of your knowledge base content directly determines the quality of your bot's answers.
Files
Upload internal documents directly to your bot's knowledge base.
Supported formats
| Format | Best for |
|---|---|
| Policies, reports, product sheets (use text-based PDFs, not scanned images) | |
| DOCX | Internal documents, SOPs, guides |
| TXT | Plain text content, logs, notes |
| CSV | Structured data, pricing tables, product lists |
| JSON | API documentation, configuration data |
| Markdown | Technical docs, README files |
| PPTX | Presentations with text content |
Step-by-step: Upload a file
- Go to Knowledge Base → Files.
- Drag files into the upload area or click Upload.
- Wait for the status indicator to show Live.
- Ask the bot a question from that file to confirm it learned the content.
File management
- Enable/disable — Toggle individual files without deleting them.
- Preview — View extracted text to verify content quality.
- Delete — Remove outdated documents (also removes from the vector index).
- Batch operations — Select multiple files for bulk actions.
File size and limits
| Limit | Value |
|---|---|
| Maximum file size | 50 MB per file |
| Recommended file size | Under 10 MB for fastest processing |
| Number of files | No hard limit — depends on server resources |
| Processing time | 10–60 seconds per file; large PDFs may take several minutes |
Best practices
- Use clean, text-based PDFs. Scanned image PDFs without selectable text will produce poor results. If you only have scanned PDFs, run them through OCR software first.
- Name files descriptively (e.g.,
pricing_2026.pdf,return_policy_v3.docx) — this helps you identify content later. - Break large documents into smaller files for faster indexing and more precise retrieval. A 200-page manual should be split into chapters.
- Remove outdated content to prevent the bot from giving stale answers. Old pricing sheets or expired policies are common culprits.
- Review extracted text — Use the Preview feature to verify that the system correctly extracted text from your file.
URLs
Teach your bot directly from public webpages. The system fetches each page, strips navigation, menus, and scripts, and indexes only the readable content.
URL modes
- Single page — Add one URL at a time for specific pages.
- Sitemap — Provide a
sitemap.xmlURL to discover and import all pages from a website.
Step-by-step: Add a URL
- Go to Knowledge Base → URLs.
- Paste a public URL (must be
http://orhttps://). - Click Add URL.
- Monitor the status: Pending → Processing → Live.
Crawl management
- Status tracking — Each URL shows its current state (Live / Processing / Error).
- Re-crawl — Re-run crawls when your website content changes to keep the bot up to date.
- Error handling — If a URL fails, check if the site blocks bots or requires authentication.
Tips for URLs
- Public pages only. Pages behind login walls will fail to index.
- Sitemap import is the fastest way to index an entire website at once.
- Some sites block crawlers. If a URL shows an error, try providing the content as a file instead.
- JavaScript-heavy sites (SPAs) may return empty content. If a URL shows no text after indexing, download the page content and upload as a file.
- Re-crawl regularly if your website content changes frequently — set a reminder to refresh monthly.
Data Sources
Path: /dashboard/data-sources
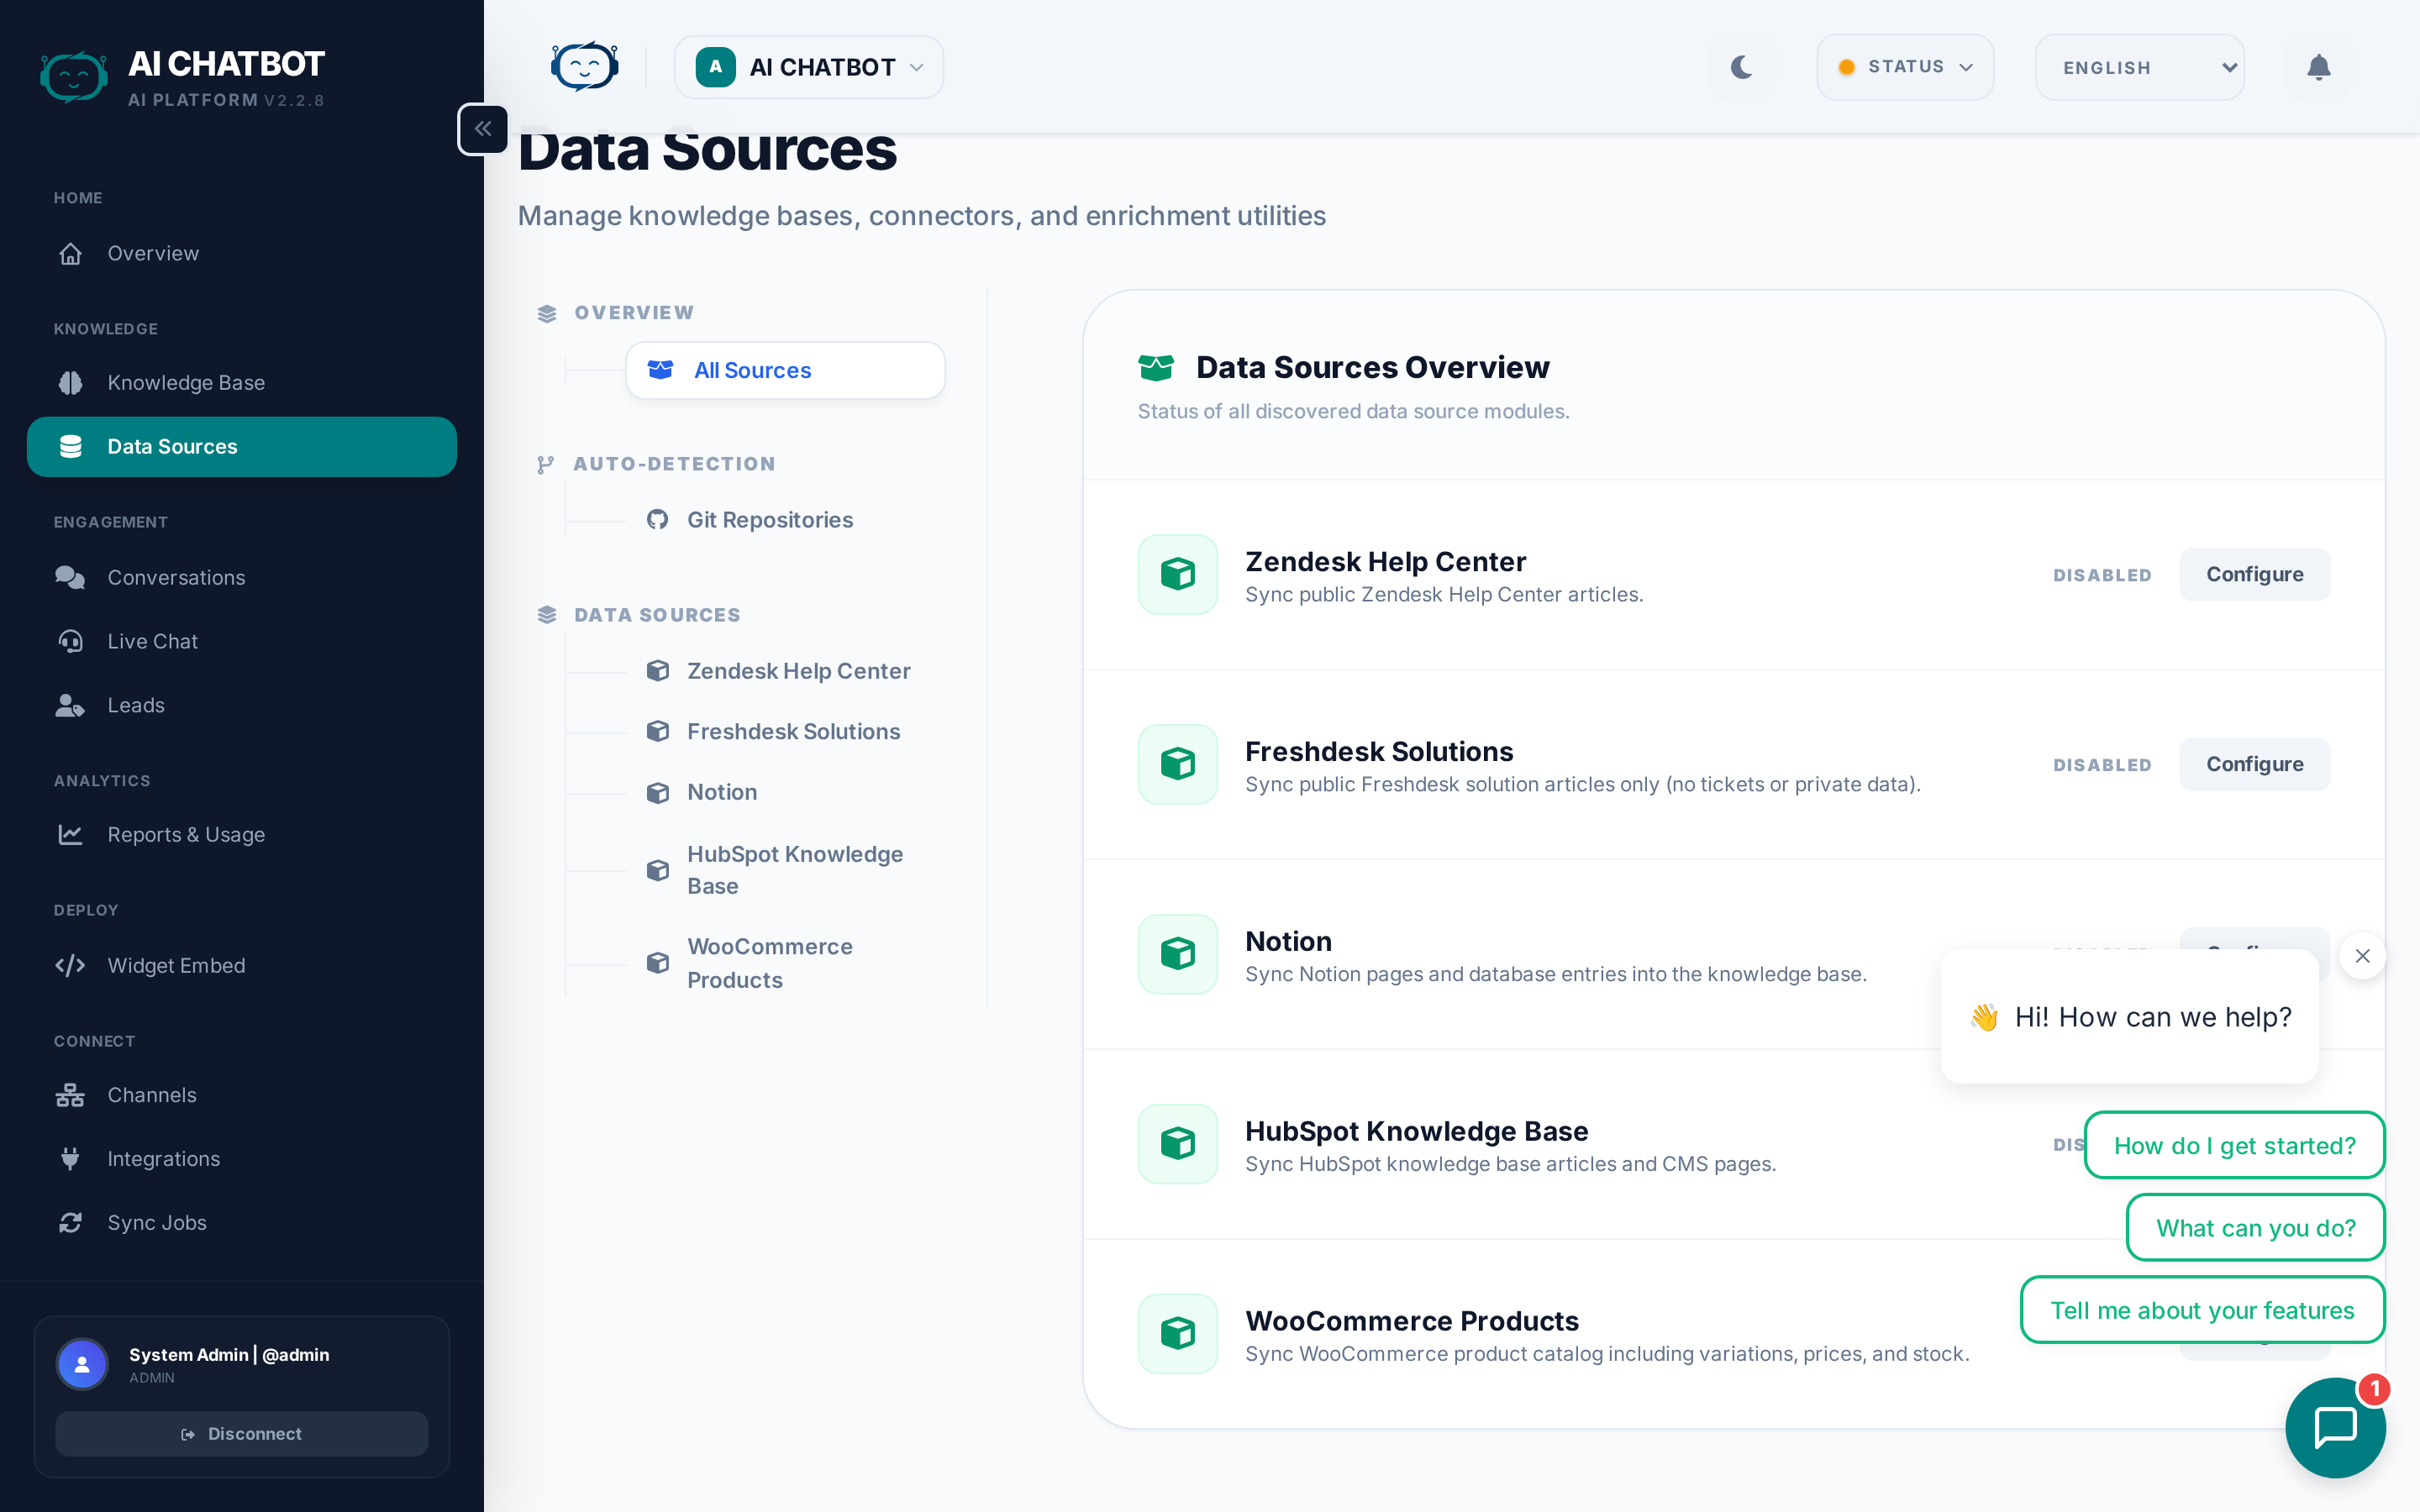
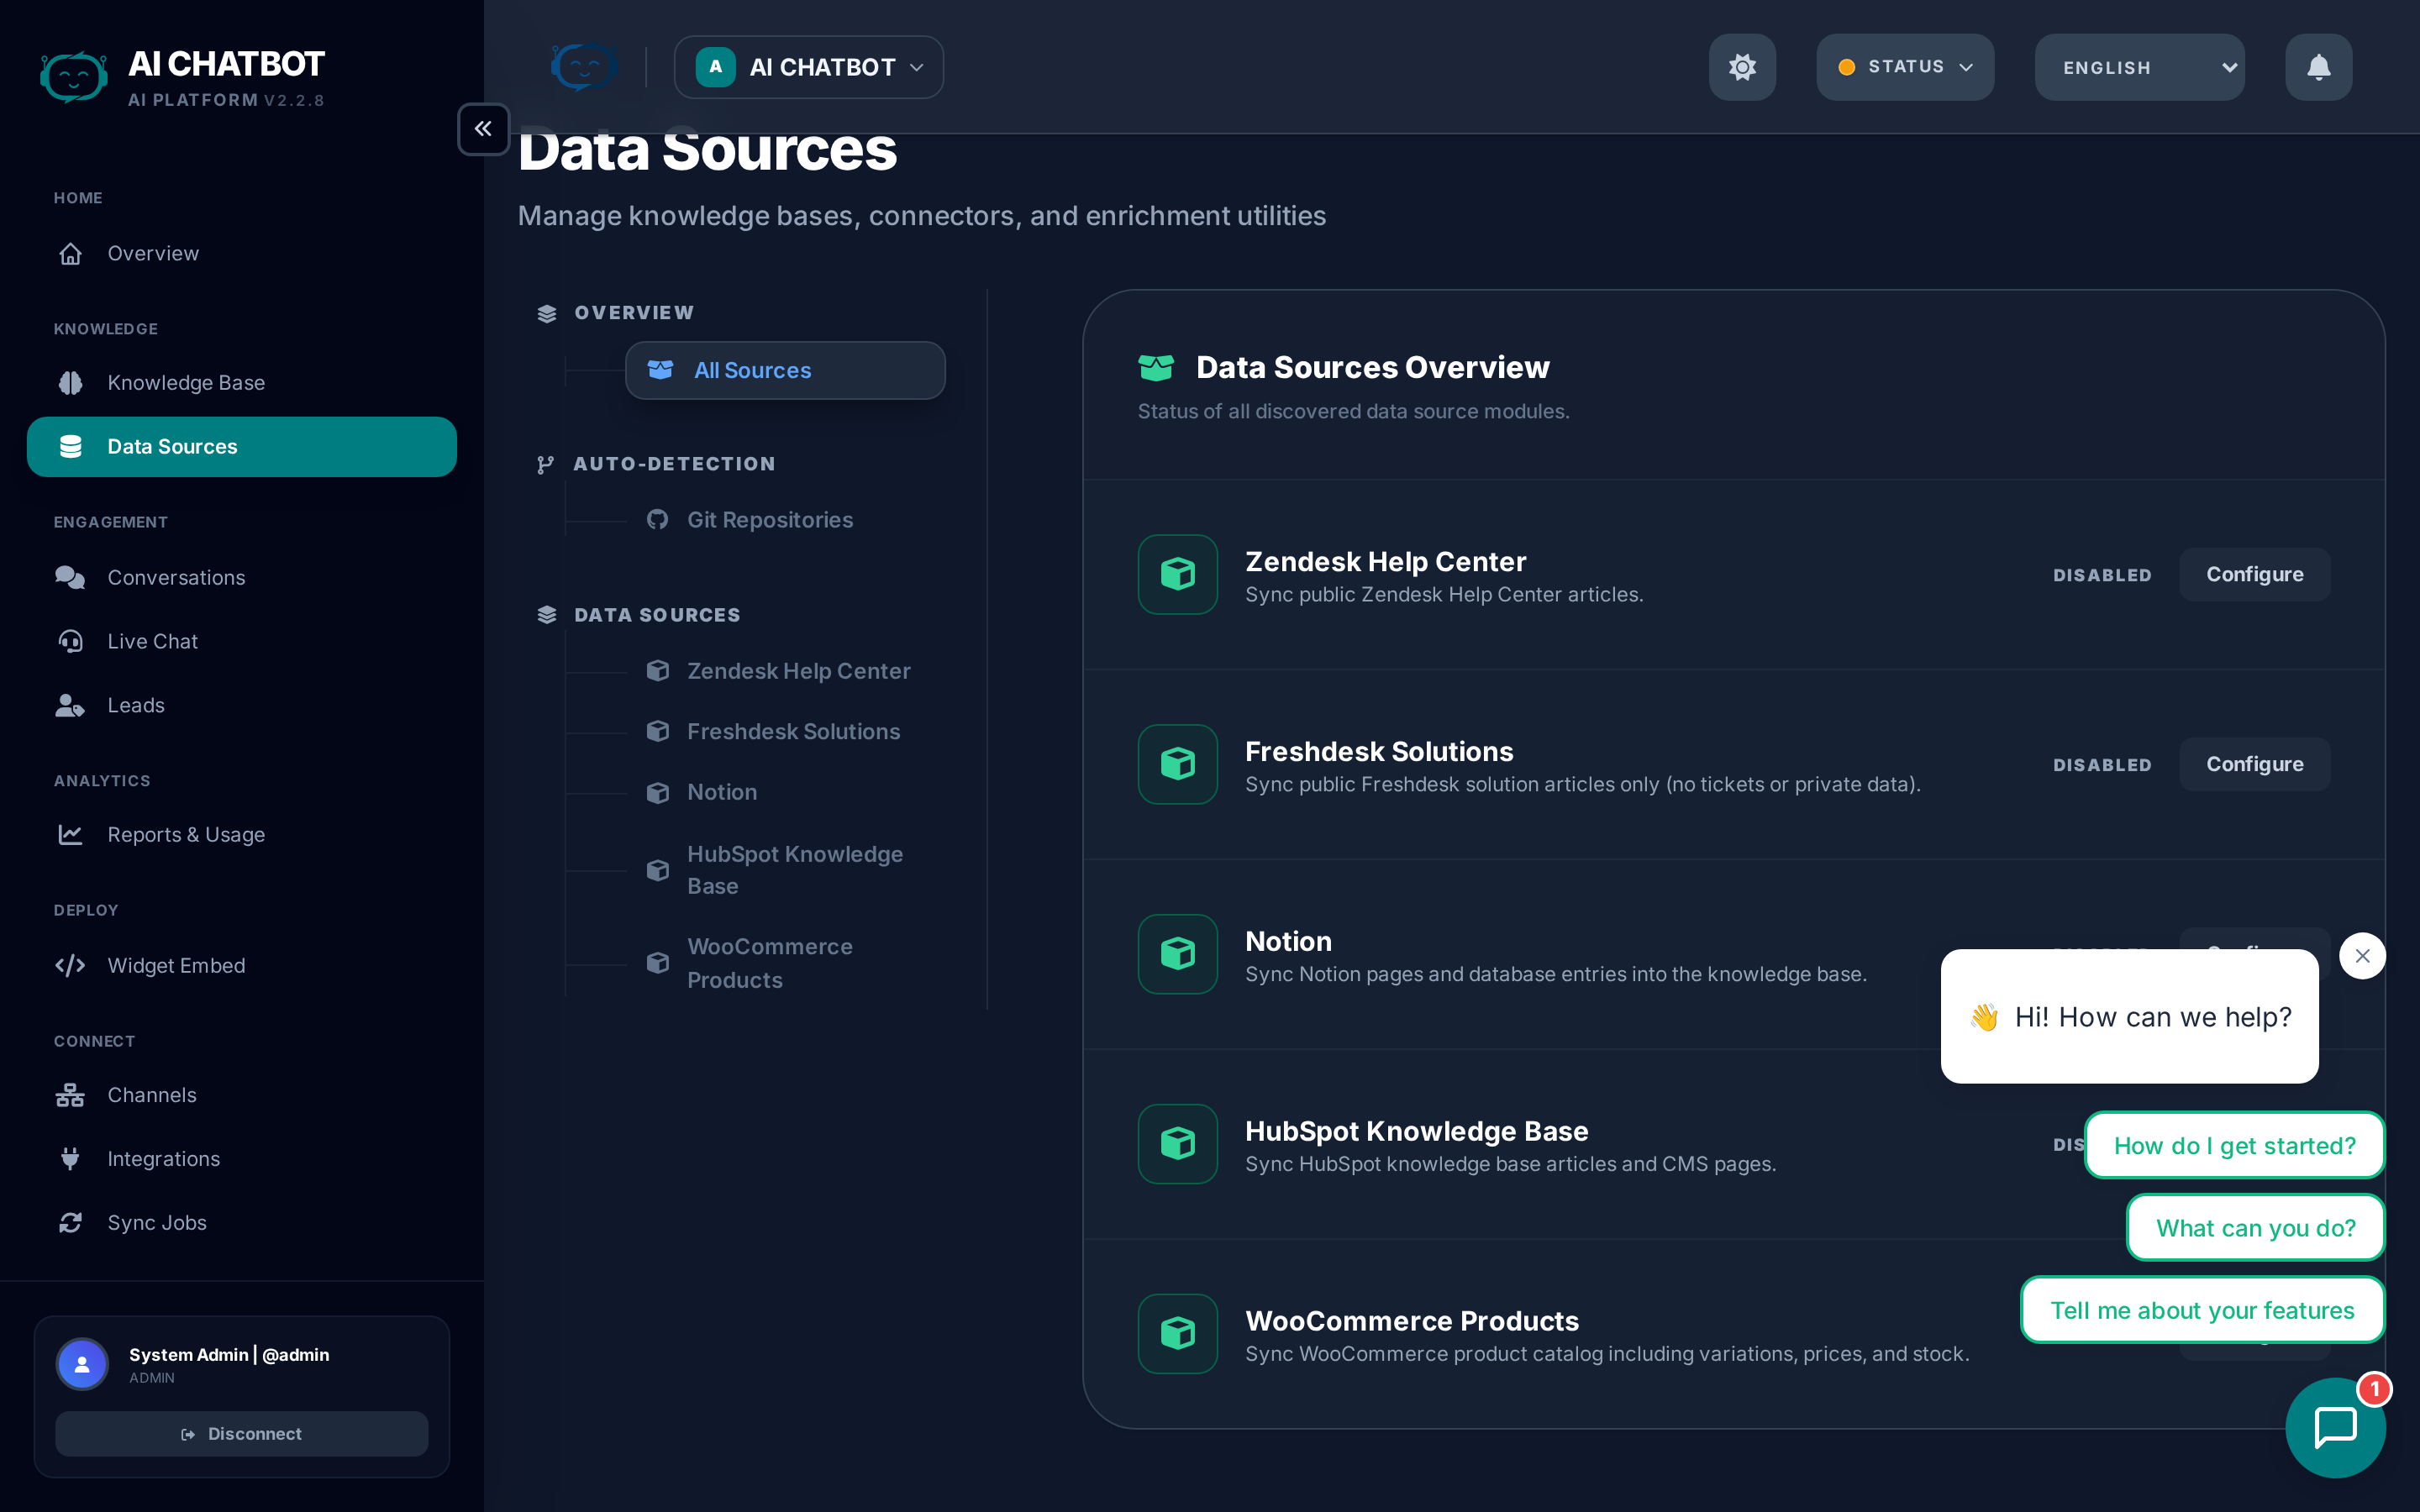
The Data Sources page provides an overview of all content sources feeding your knowledge base. It shows:
| Column | What it shows |
|---|---|
| Source | File name, URL, or FAQ identifier |
| Type | File, URL, or FAQ |
| Status | Live (searchable), Processing, Error, or Disabled |
| Size | Content size or number of chunks indexed |
| Last Updated | When the source was last indexed or re-crawled |
WordPress sync
If your website runs on WordPress, FRENZY.BOT can automatically sync content from your WordPress site:
- Go to Data Sources or Knowledge Base → URLs.
- Add your WordPress site's
sitemap.xmlURL (usuallyhttps://yoursite.com/sitemap.xml). - The system discovers and indexes all published pages and posts.
- When you publish new content on WordPress, re-crawl the sitemap to keep the bot updated.
Keep your bot in sync with your website
After publishing new blog posts or updating product pages, click Refresh Knowledge Base to re-index everything. This ensures the bot always has your latest content.
FAQs
Add exact answers for your highest-priority questions. FAQs give you complete control over specific responses.
Why FAQs are powerful
- Priority answers — FAQ responses take precedence over document-based retrieval for matching questions.
- Instant indexing — FAQs are available immediately, no processing delay.
- Precise control — You write the exact answer the bot will use.
- Easy updates — Edit or delete individual Q&A pairs without re-uploading files.
Step-by-step: Add an FAQ
- Go to Knowledge Base → FAQs.
- Click Add FAQ.
- Enter the question your users would ask.
- Enter your exact answer.
- Save — the FAQ is live immediately.
- Test in chat to verify.
When to use FAQs
| Scenario | Example |
|---|---|
| Pricing questions | "What does the Pro plan cost?" → Exact pricing answer |
| Policy responses | "What's your return policy?" → Official policy text |
| Hours / contact info | "When are you open?" → Business hours |
| Common objections | "Why should I choose you over X?" → Positioning answer |
| Corrections | Bot gets something wrong → FAQ overrides with correct answer |
Refreshing knowledge
Click Refresh Knowledge Base to re-index all content. This rebuilds the vector index from your current files, URLs, and FAQs.
When to refresh:
- After uploading or updating files
- After website content has changed
- After adding multiple FAQs in batch
- After removing outdated content
Refresh is non-destructive
Refreshing does not delete your source content. It re-processes everything to ensure the vector index matches your current data.
Per-bot data isolation
In a multi-bot setup, each bot has its own separate vector collection. This means:
- Bot A's knowledge base is completely invisible to Bot B.
- Uploading a file to one bot does not affect any other bot.
- Deleting a bot removes its entire vector collection and all uploaded files.
- Each bot can have completely different content, optimized for its specific audience.
FAQ
Q: A file shows "Error" status.
- The file may be corrupt, password-protected, or in an unsupported format. Try converting to PDF or DOCX and re-uploading.
Q: URLs are blocked or show empty content.
- Some websites block automated crawlers. Try a different URL, provide a sitemap, or upload the page content as a file instead.
Q: The bot answers incorrectly about a topic.
- Add an FAQ with the exact correct answer — FAQs take priority. Also review your system prompt in Settings → Model Behavior for conflicting instructions.
Q: How long does indexing take?
- Files: typically 10-60 seconds depending on size. Large PDFs or sitemaps with many pages can take several minutes. Monitor progress in Sync Jobs.
Q: Can I index content behind a login?
- Not directly. Pages requiring authentication will fail. Export the content and upload it as a file instead.